Tuesday, December 16, 2008

OCA Tutorial # 6 Gift Jar Decorations by Suzanne of Silver Tree Art

Many give and receive yummy goodess filled in glass jars. We can reuse these jars, and they are a great way of showing off your culinary abilities. So far this year we received a jar of chocolate chip cookie mix and orange spice tea is on the way. I wanted a nice way of topping my homemade strawberry lime preserves and came up with this oilcloth solution in lieu of using fabric. Thus, the tutorial on cupcake toppers was topped with jar toppers! Cupcake Toppers to come early 2009.
Materials:
1 fat square oilcloth (or more, depending on the number of toppers you wish to make)
scissors
pencil or pen
round object for tracing
rik rak, yarn, or ribbon

Step 1: Gather your materials. Remove the lid or outer ring of your jar in preparation of step 2.
Step 2: Using the lid of the jar as a base, make your topper up to a few inches wider all the way around. For the green kiwi dot oilcloth, I used a CD to trace. For the white dot on red oilcloth, I cut my own circle 2 inches wider all the way around. Trace CD or other round object.
Step 3: Cut your circles out of the oilcloth. Using one hand, secure the circle on top of your jar, careful not to spill it's contents. The lid is underneath the oilcloth to keep the food sealed. For a canning jar lid, use the outer ring to secure the oilcloth on top. This takes a little care, as the oilcloth is a little thick. If you go slowly and maintain patience, you'll secure the ring onto the jar. You can also place the oilcloth directly on top of the jar lid & ring and tie off with your ribbon to secure. (I tried using tulle underneath the oilcloth but changed my mind. You see it's not there in the picture below.)

Step 4: Place ribbon around the ring to add a little sparkle. You can add an ornament or candy cane to the ribbon for that extra pizzaz. The project takes little time and adds a lot of color.

In the spirit of sharing and making handmade, here are the cookie jar instructions as given to me. Enjoy, crafters!

Chocolate Chip Cookie Mix (for a 1 quart glass jar)

Jar Contains:
1 2/3 c. all purpose flour
3/4 tsp. baking soda
1/2 c. white sugar
2 c. semi-sweet chocolate chips
1/2 c. packed brown sugar

1. To make a jar and share: layer the following: flour, soda, sugar, brown sugar, chocolate chips. Seal. Attach directions and enjoy!

2. Directions for Cookie Making: Empty contents of jar into a large bowl. In a separate bowl, combine 3/4 c. butter, 1 1/2 eggs, and 1 tsp. vanilla. Beat until creamy. Add to dry mixture. Drop by teaspoonful onto an ungreased cookie sheet or silpat lined cookie sheet, and bake in a preheated oven of 375 degrees F (190 degrees C) for 8-10 minutes. Serve warm with milk and enjoy!


Tuesday, December 2, 2008

OCA Tutorial #5 Oilcloth Chain by Suzanne

Oh, it's the season to make paper chains. Only this year, use OILCLOTH from your favorite oilcloth vendor, Oilcloth Addict. I've already procured my stash of favorite oilcloth fabrics to create this amazing oilcloth chain which will be used in our family decorations.

Materials:
4-6 fat quarters oilcloth, coordinating colors or patterns (1 yard per fat quarter*)
scissors or rotary cutter
ruler
pencil (or writing utensil to trace/mark)
translucent tape

Step 1: Gather your materials. Decide how you want your chain to look. Do you want your chain to be double or single sided? If double sided, do you want your chain link to match (front & back) or to differ? Once you have decided, you'll roll along the process. [Note: The double sided chain has a wonderful weight to it. If your tree is lightweight, you'll need to decide how you want it to drape.]

Step 2: You'll be cutting material in strips of 1.25 x 5 inches. You can adjust to 1 inch x 6 inches or 1 1/2 inches x 6 inches. You choose what you like and go with it! In a 18 inch x 21 inch fat quarter you can cut up to 60 strips (or 30 chain links front/back) of the 1.25 (1 1/4") x 6 inch strips. Using your ruler, measure your strips. If you're handy using the rotary cutter, mark your 6 inch lines with a pencil and measure & cut your 1.25 inch strips. If using scissors, measure and mark before cutting.

Step 3: Assembly. Place two strips with the back side facing each other.

Loop them around together. I placed one edge between the other two pieces, sandwiching them in so that the chain link looks really clean.
Place a piece of translucent tape horizontally across the edge, securing the tape hanging over to the opposite side of the chain. Place two more pieces together and loop through the first chain. Repeat steps until you have the desired length of your chain.
The transparent tape looks great on the oilcloth. You hardly notice it's there, and it's quite durable if you're overlapping your tape to the back side of each link.

*Measurements: Using the 1.5 x 6 inch strips:
9 chain links = 12 inches loosely hanging.
1 fat quarter makes 1 yard of chain, front and back or 2 yards single sided.

Decorate your tree, your doorway, hang these along your windows, line your table centerpiece, along the edge of a room's ceiling...the possibilities go on and on. As you make these, remember to include the kids! It's a great family night project, as it takes a little time. It's well worth the effort.
Cheers! Enjoy making your chain as I have ours (pictured above). Happy Holidays!

Save your scraps! Suzanne of Silver Tree Art's Next Tutorial: Flag Cupcake Toppers using scraps as small as 1 x 2 inches as part of her focus on Party Planning!

Kelly here... Suzanne of Silver Tree Art had created this tutorial for us here at OCA! I am also very lucky to have her some of her creative energy in my studio here at home. Suzanne if full of great ideas and will be sharing those that are made with oilcloth here on the OCA blog! Thanks girlie, you are the best!

As always OCA is dedicated to offering you great tips and projects. If you have an idea that would fit with in out blog please let us know. We would love to share your ideas too!

Tuesday, November 25, 2008

OCA Tutorial # 4 Oilcloth Memory Game by April


Oilcloth Memory Game Tutorial

Little ones will love playing this memory game, while their adults will love the durability that oilcloth provides to this classic. This 3 inch set was made for a young toddler. If you are making this game for an older child you may chose to make the pieces smaller.


Materials:
1 Oilcloth Addict Charm Pack
1 Fat Quarter of Oilcloth from Oilcloth Addict
Cutting board
Rotary Cutter
Pinking Shears


Begin by choosing ten different oilcloth charms from the charm pack. Each one of of these will form one pair of memory pieces.


Using your rotary cutter and ruler trim the charm into a 6 by 3 rectangle. Then cut the piece in half, forming two 3 by 3 squares. Repeat these steps with each charm. When you have finished this there will be 20 3 by 3 pieces, (2 from each of your original 10 charms).


Now you will need 20 3 x 3 squares from your fat quarter fabric.
Begin by cutting a 3 inch wide strip the length of your fabric.


Then cut this piece every three inches to form your 3 x 3 squares.


Next, put a black dot with each one of your charm pieces with the
wrong sides of the fabric touching. Pin in place.


Sew 1/4 inch in around your square, backstitching at the beginning and end.


After sewing all of the pieces, use pinking sheers to even out the
edges and give a decorative touch.

Enjoy!

Kelly here... Thanks to April for creating this wonderful tutorial for us here at OCA! April is mommy of two young girls (cute as can be), she shares some of her creative time as one of my wonderful Modern June stitchers.thanks girlie, you are the best! I am a lucky girl to have such a great team!

As always OCA is dedicated to offering you great tips and projects. If you have an idea that would fit with in out blog please let us know. We would love to share your ideas too!

Monday, November 24, 2008

JUST ARRIVED!


Lookie, lookie two new oilcloth just arrived! Pretty pink paradise lace and a lovely lavender gingham. I can't help but think of spring projects when I look at these, I know it isn't even turkey day but I really do despise winter, forgive me.

I would love to make a tablecloth with the pink lace trimmed in black, very Hollywood Regency!

Friday, November 21, 2008

cool combo, red-white-green


I am lovin' this combo that I cut out for a client today! I have always wanted to pair the lime gingham with the aqua dot! The rosegale and the red dot make it a perfect cool combo!

Monday, November 17, 2008

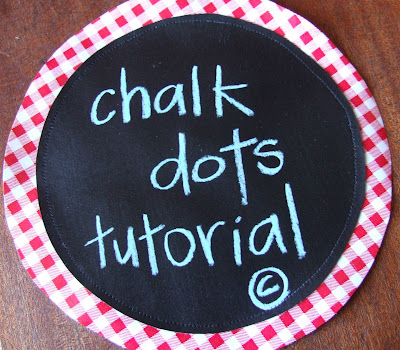
OCA Tutorial # 3 Chalk Dots by Suzanne of Silver Tree Art


What fun dots! We plan to use these on the walls for the next party, a smaller set as a matching game, and as a way to leave each other fun "notes" of good day wishes on the doors. For the holidays, you can add a grommet + string or punch a hole and use these as adorable reusable gift tags. Adding your own blend of colors to the mix makes these especially fun. Think of what you can applique these to!

To create, I recommend using a variety of household items and making this fun for you + kids. For fun, trace the rim of cereal bowls, serving bowls, candle holders, toys, games, etc. You can make a game of finding a variety of circular shapes around the house.

Materials List:

1/2 to 1 yard chalk cloth
4-6 fat quarters, depending on your color variety
black thread
scissors
circular shapes and/or compass for tracing

First, gather your materials. To assemble using your sewing machine, you'll need thread, pre-cut chalk circles in the same or varying sizes, larger pieces of oilcloth for the chalk cloth to be sewn onto, and a compass or slide ruler if you need precision.

I cut my chalk dots first and sewed them onto my oilcloth before cutting the oilcloth. However, if you are using a compass or circles of varying sizes, go ahead and cut out all your pieces. I like cutting my circles (like my silvertreeart circles brooches) free form by hand. You may need symmetry - do what's best for you and yours.

On the machine, I used the right edge of my quilting presser foot as a guide around the chalk cloth, sewing 1/4 inch inside the circle, sewing clockwise around the entire circle. Backstitch and trim as you overlap your thread.


I like using the black thread on the chalk cloth. It looks good and hides any imperfections. You may like a contrasting color.

Enjoy!


Kelly here... Suzanne of Silver Tree Art had created this tutorial for us here at OCA! I am also very lucky to have her some of her creative energy in my studio here at home. Suzanne if full of great ideas and will be sharing those that are made with oilcloth here on the OCA blog! thanks girlie, you are the best!

As always OCA is dedicated to offering you great tips and projects. If you have an idea that would fit with in out blog please let us know. We would love to share your ideas too!

Tuesday, November 11, 2008

OCA tutorial #2 "Keep on Rollin"


It's Tuesday so that means that it is tutorial time here at OILCLOTH ADDICT! Todays guest tutorial comes from Skip to my Lou! My friend and assistant Suzanne (of Silver Tree Art fame!) introduced me to this next blogger! This blog is choke full of free patterns, downloads and loads of inspiration! I could get lost there for days! Cindy is letting us share her Crayon Roll Holder, and we can't thank her enough!

Suzanne brought this idea to me because she believes this would be a great project to do with Oilcloth, I could not agree more! Oilcloth is great for all kinds of kids products. It whips clean with a damp sponge and comes in tons of great colors and patterns. I for one am seeing some lovely hand made gifts for my nieces and nephews! I know the parents will love them too!
There is two ways you can change the tutorial below you could simply replace the larger inner piece that Cindy has used the iron on vynal or you could use oilcloth for the entire projects.

Here is our modified supply list for the Crayon Roll:


One to three OCA Fat Quarters
1 - 5 X 16 1/2 inch piece of fabric for the outside (oilcloth optional)

1 - 5 X 16 1/2 inch piece of fabric the the inside
(OILCLOTH)
1 - 6 X 16 1/2 inch piece of fabric folded lenghtwise and pressed for the pocket
(oilcloth optional)
ric rac (never optional in my world!)
cord and cord stop

Now on with the tutorial...NOTES FOR OILCLOTH ARE IN RED!

This Crayon Roll Holder is a great and useful gift for children!

I noticed on our crayon roll that the inner fabric lining gets marked up quite a bit from the crayons going in and out. So this time instead of using interfacing on the lining piece I covered it with iron on vinyl. This is such a cool product. I had to keep myself from covering all the pieces—and I am glad I didn’t. The turning at the end gets it a bit wrinkled. I fear if I had done the whole thing it might look like a mess. The only draw back is that it is slicker and the crayons have less friction. However the new closure allows you to tighten it up to keep the crayons inside.

You need:

1 - 5 X 16 1/2 inch piece of fabric for the outside
1 - 5 X 16 1/2 inch piece of fabric the the inside
1 - 6 X 16 1/2 inch piece of fabric folded lenghtwise and pressed for the pocket
ric rac (if desired)
1 - 5 X 16 1/2 piece of iron on vinyl
1 Cord Stop

Iron on the vinyl to the right side of your lining piece following package directions.

Place pocket piece ontop of right side of lining. Starting 1 1/4 inches over from the edge, stitch from top of pocket (back stitch at top) to bottom. Then stitch every 1 inch. You should have 1 1/4 inches left on the other end. USE LONG STITCH LENGTH when stitching directly on top of oilcloth.

If using ric rac pin it around the edges, overlap at bottom. I use fray check to keep ends from unraveling.

Place outside piece ontop of pocket and lining, right sides together. Place a 20″ piece of cord (folded in half) in the middle on the right side. Ends of cord go towards the center.

Sew all the way around 1/4 inch from the edge. Leave a 2-3 inch opening at the TOP. OILCLOTH CAN BE TOUGH TO TURN SO LEAVE 4-5 INCHES FOR THE OPENING.

Clip corners and turn. Press (If you do use oilcloth DO NOT press OILCLOTH with bare hot iron), making sure to press opening to the inside. FINGER PRESS OILCLOTH EDGES SMOOTH. Pin opening shut and then top stitch all the way around very close to the edge (making sure you sew all layers of the opening shut.)

Squeeze the Cord Stop and thread both ends of the cording through the center hole (have patience, thread ends one at a time). Tie the ends of the cording together into a knot. I placed a drop of glue in the knot to keep it secure and then put fray check on the ends.

Finished! OCA recommends you place your finished product laying open on a flat surface and stack a few heavy books on top of it to get the seams nice and flat.


This tutorial was originally published at Skip to my Lou on September 9, 2008. Oilcloth Addict has posted it with their express permission. As always OCA is dedicated to offering you great tips and projects. If you have an idea that would fit with in out blog please let us know. We would love to share your ideas too!


Go get crafty!

OCA sewing tip #3---PRESSING OILCLOTH


Oilcloth can not be pressed with an iron in most cases. You can use a very low temp iron on the back side but I really don't suggest it. Trust me, I have had my fair share of accidents.

So how do I get a nice finished look to my oilcloth products? Well, I finger press-- A LOT! I simply use my fingers to create folds and creases while I am sewing. I do this by running my fingers across the oilcloth several times while applying pressure. This heats up the oilcloth and makes it supple and easier to crease.

If I have a lot of layers and some extra time I will place my project under a pile of books.

Note: As in all sewing there is a big difference in pressing and ironing! When working with oilcloth pressing is good, ironing is bad.

Wednesday, November 5, 2008

OCA Tutorial #1 "Not your Mama's Rubber Gloves"

Well I am so proud to announce our very first guest tutorial! The brilliant ladies at Little Birdies Secrets have just posted this great tutorial earlier this week. Well I did not hesitate one second to contact them, asking them (ready to beg them) for permission to borrow their wonderful post. The three ladies that run this great blog are dedicated to offing us creative, dyi projects. Little Birdies I can't thank you enough for sharing!

I have always admired these great gloves, what's not to love... pretty hands, rick rack AND oilcloth! I have always wanted a pair for myself and yet again I am tempted to make them for Modern June! HMMMMM.....how cute, they could match our aprons!

But honestly right now I am thinking holidays!!! Specifically "Girl Friend Gifts"! How cool would that be? Fun and inexpensive. One yard of OCA oilcloth costs just under $7.00 and you can get 4 pairs of gloves out of it. I estimate that four presents would cost about $4.00 a piece!!! Now that is a great price for something totally kitsch and useful!

Now on with the tutorial...


This is one hilarious project. I love these dish gloves! For the lady that wants to stay fashionable at all times, even while cleaning. Think hostess gifts! Maybe pair them with a matching apron. . .

Not Your Mama's Rubber Gloves Tutorial

What you'll need:

Household rubber gloves (Walmart has white ones, Target has blue--check dollar stores, too)
Oil Cloth (¼ yd. cut is enough)
Ribbon or trim
Sewing machine
Hot glue gun

Okay, let's get started!

1. Put the gloves on and measure around the end (largest part of the glove that is on your arm). You want your finished, pleated oilcloth to be ½ an inch larger than this measurement. My gloves were 10 inches around so I wanted my pleated oilcloth to be 10 ½ inches long.

2. Cut your oilcloth. I cut my oil cloth to be 4 inches wide and approximately 37 inches long. Pleat the oilcloth by making small folds (about 1/4" to 1/2" long) and sewing over the fold across entire piece.


3. Take the short edges of the oil cloth, put them right sides together, and sew them using a ¼" seam. You should now have a ring of pleated oilcloth.


4. Slide the glove onto your sewing machine. Place the oilcloth wrong-side out on the machine over the glove, leaving a 1/2" of glove at the top, and stitch together.


5. This step is optional, but very cute. Use pinking shears to cut the unsewn, bottom edge of the oilcloth.


6. Hot glue coordinating ribbon around the glove, leaving two long tails on the top of the glove (if you want a bow). Tie the tails in a bow. Tip: It's easier to tie the bow if you can have someone else wear the gloves while you do it.

7. Go do those dishes like the hot mama that you are!


This tutorial was originally published at Little Birdies Secrets on November 3rd, 2008. Oilcloth Addict has posted it with their express permission. As always OCA is dedicated to offering you great tips and projects. If you have an idea that would fit with in out blog please let us know. We would love to share your ideas too!

Go get crafty!