Wednesday, April 30, 2014

Treasured Garden!


In the last few days Modern June has received some treasury love on Etsy! Let the gardening begin!
 Who's ready for picnic snack time? Momma 190 and I sure are. Thanks for the Oilcloth party banner love!

 How does your garden grow? Super cute collection by Olive and Ruby. Thanks for the oilcloth placemat love!

 Time to garden by Sketch Away gave us some oilcloth garden apron love! Thanks bunches!!
Garden Art by Aloha Mermaid Jewelry also gave up the love for the oilcloth garden apron. XOX

Fresh Veggies, indeed! This yummy treasury comes to us from KOLORIZE. More oilcloth garden apron love! : )

 I'm tickled pink!!

XOXOX,
Kelly

Sunday, April 20, 2014

Mr. Modern June's Easter Trickets

If you've seen my Life Made Lovely's house tour you know that I have a lot of great vintage goodies in my house that came from my Mother-In-Law. Today I want so share with you my hubbies Easter trinkets from his childhood. I'm so glad that Jackie saved all the sweet things.
After having these on my mantle for the last few weeks, I dug through our Easter bin and wondered what my kids might treasure when they have homes of their own. Hmm... that's a fun thing to think about.
I love these sweet little bunny and egg. Chippy vintage goodness.
This sweet set of bunny love was a recent purchase. Don grew up with a rabbit family like this Mr. and Mrs. Rabbit. Sadly, one of his siblings scored the bunny family. He's been hunting Ebay for a the whole family. Hopefully we'll find a sister and brother so our sweet little family will be complete. 

 I hope you all enjoyed a lovely day with your peeps!

XOXOX,
Kelly

Friday, April 18, 2014

Blog Tour Wrap Up

I can't thank the following bloggers enough for all the love and support you've given me in the last 10 days!! Many kisses and hugs to those that posted and commented, you've make this book release so very special.
Modern June!

Thursday, April 17, 2014

Blog Tour Stop 10: Creating a Mood


The comments are now closed. 
The winner is #13!!

Congrats to Jusmom1


On August 27, 2011, the week my first book was released, the East Coast was visited by Hurricane Irene. Sadly, Irene dropped a 100 year old tree on the back of our home before leaving Richmond, VA. It was a terrifying night, thankfully we were all in the same room together and as far away from impact as possible. The next afternoon I attended my book release party in shock while my husband found tree guys and dealt with the insurance company.

Sometime within the 7 months that it took to reno our home I realized that when life gives you lemons you make lemonade. Well, let me tell you, I was given a whole lot of lemons!! Once I had a new roof, ceilings and plaster walls I was able to have new paint. New paint color means makeover in my world. Thus, the concept of At Home with Modern June was born. 

The tree fell on the back of the house, it was so big you could only see the tippy top of the chimney. Early on that fateful day I had spent the day sewing away in my home studio, looking out the window at the tree swinging from side to side. I had a horrible feeling and I got out of that room as quickly as I could. Here's a look at the studio reno photos. 

Enough with the doom and gloom, let's fast forward to what that home studio looks like today! Bright new windows allow the light to shine into my sewing cave! Pot lights replaced the ugliest and most ineffectual light fixture of all time. Once this room was done, I was able to get to work sewing up a new home for my family! 


In At Home with Modern June have an entire chapter devoted to chapter devoted to sewing/creating for a creative space. There is an Ironing Table and a Sewing Supply Case (featured on Crafty Pod). As well as an Embroidered Pincushion and a Sewing Machine Cover. My favorite project is my GIANT Mood Board!! 
This mood board saved my mind, it helped me sort my thoughts when writing the table of contents.  The inspiration and the materials were all sorted by room and project, so it served as a visual reminder of what went where. The color story it told kept me on track.
Today I am giving away a copy of my book and a pretty bundle of ribbons so you can make your own mood board! Please leave a comment so you are entered to win. Tell us what your planning to make next and what your inspiration is?

XOXOX, 
Kelly
 

Tuesday, April 15, 2014

Tour: The Crafty Camper!

Love the fun patterns on this oilcloth! 
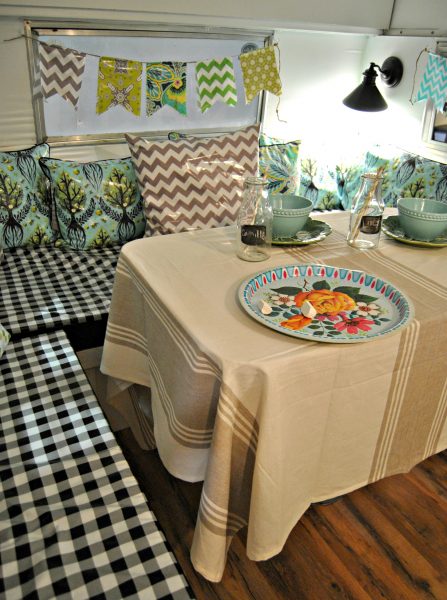
Yesterday I showed you have to make the Scrappy and Simple Buntings that I made for a very cool camper. Well!! Today, we are going to tour that Crafty Camper! Please note that the photos below where shamelessly swiped from Kelly Elko's wondrous blog, Eclectically Vintage. All photo credit's go out to Kelly, the other Kelly! Here's her tour post!


These photos were take at the Philadelphia Home Show, where Denise from The Painted Home, debuted her Crafty Camper. As you can see below I had a fun decking out the 1972 Shasta with Modern June goodies!
  The Crafty Camper - take the tour of this mobile DIY workshop!
 Aren't my oilcloth and chalk cloth banners fabulous swinging off this camper?

Cute oilcloth pillows - love the vintage camper!

I made a few specialty pillows out of oilcloth for the camper too. More about them soon! Our regular  oilcloth pillows are available on our new website, ModernJune.com!

Oilcloth pillows and buntings - such a fun retro look!

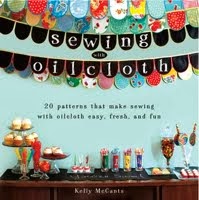
I also made the camper some oilcloth seat cushions using my pattern in Sewing with Oilcloth! The laminated cotton throw pillows are made using the pillow cover pattern in my latest book At Home with Modern June. My pillow cover pattern uses an invisible zipper--it's so easy that even I can do it! Those that have worked for me know that I don't DO zippers! (ie, I did them poorly until now!!)

Peek inside a 1972 Shasta vintage camper completely renovated

Check out the Scrappy and Simple Bunting hanging on the window, what a fun way to create some interest, both inside and out. I can almost see them swaying in the breeze now!  

Galvanized bucket sink
There is so much more to be seen! Again, check out Kelly's entire tour here! Then head over to the Crafty Camper website to see when camper is in your area doing DIY classes! Eek!! You can rent this as well!! Also, for the part I like best!! If you go way back to Denise's December and January photos on Facebook you can see some great before and during photos of the Shasta!

XOXOX,
Kelly

Sunday, April 13, 2014

Scrappy and Simple Bunting Tutorial!


Here is a very simple way to make a pretty spring banner. This is a much simpler and smaller version of the Fair Flags that we made last year for the Rhinebeck Country Living Fair. I made the ones shown here for The Painted Home's, Crafty Camper.
Materials and Supplies
  • Fabric scraps that are at least 6" W x 16" L
  • Twine, yarn, or rick rack, 35" longer than desired length of banner
  • Clear ruler
  • Scissors
  • Rotary cutter and mat (optional)
Planning It Out
As you plan out your Scrappy and Simple Bunting you want to have a location in mind. Lets use my fireplace mantel as a example. My mantle is 80" wide so I added 20" for two ties and 15" for swag. Thus my total twine length was 115" long.

Each flag is 6" wide and I like the look of 1"- 2" between each flag, so I opted for 8 flags. The great thing about using twine, is that if you need it to be longer you can can just tie on more twine. The best part of this project is simplicity and speed!
Again, for this project is that you can use any type of fabric you desire! I used scrapes of laminated cotton for this bunting, it was all leftover fabric from the pillows that I made for the Crafty Camper. You could use cotton, oilcloth or even paper for this project.
Cut the scrapes down to 6" W x 16" L rectangle and fold them in half lengthwise. Take pin the raw edges together near the bottom. 
Now fold your flag in half width-wise so you have a 3'' x 8" flag to cut. With your rotary cutter, mat and clear ruler, cut a diagonal line that cuts a 2" notch into the center of the flag.
Now you have a notched two-sided flag.
Now it's time to get stringing! Take your twine and measure out a 10" and make a double knot at that mark. This is where you are going to start your flags. Just open up your flags and slide then around the twine, now just fold the flag closed. 
The shiny fabric can be a bit sticky so when working with laminated cotton or oilcloth you'll want to use a specialty foot like this roller foot that I attached to my sewing machine. Don't have a fancy foot? No worries, just trick out a regular foot with tape.

Here's another handy tip, when your top stitching on slick fabric you want to lengthen your stitch length to 4, this will keep your sewing machine moving along easily.

Now line the side of your foot right up to the bump of twine that is within the fold and sew along the top of you flag, creating a little channel for your twine. Back tack on each end of your flags. Be careful, making sure not to sew across twine. If you catch a bit of it by accident you just need to rip out your stitches and redo it. The flags need to move freely from right to left on the twine.
This is a great project to use the sewing technique called chain stitching. As you finish sewing the channel for one flag keep sewing. Run your machine to create a few (empty) stitches, then add the next flag and sew that one in place. Once you have all your flags sewn around the twine you can clip the treads between each flag and you are almost done!
The only thing left to do it to hang and enjoy it! I use cup hooks on my mantle to hang all sort of good things through out the year. These hooks were left over from Christmas stockings. I put a slip knot at each end of the twine and hook it to the hook. Just move your flags from right to left till you like the spacing. 
I love how Denise used her Scrappy and Simple Bunting in the Crafty Camper! What a fun little window treatment.

I hope you enjoy this simple little bunting!

XOXOX,
Kelly

Friday, April 11, 2014

Best kind of trade, chalk cloth for joy!

Months and months ago, I said yes to a giveaway. Little did I know that I was in for a real treat! Heather, from Life Made Lovely asked if I'd donate some chalk cloth for a Be Crafty retreat. OM! I couldn't refuse, in fact I wanted to attend the crafty workshop!

I had almost forgotten all about it when I saw a ton of super cute photos turn up on Instagram! The photos were of the chalk cloth hoops that Amanda (Be Crafty) and Lesley from Recipe for Crazy made with the cutest bunch of crafty gals in the southwest! See the group shot here!

I've snagged some of the photos for you all to see...

 How cute are they? 
 First up, wrapping of the hoops.
Slide the chalk cloth into the hoop! 
 Get chalky!
Let's go out there an be crafty too!

XOXOX,
Kelly 

Thursday, April 10, 2014

Non-Traditional Ways to Iron Oilcloth

Oilcloth is a PVC product so you never want to take an iron to it. Instead we have to get tricky when sewing seams that we would normally press. I have 3 simple methods for you to try; finger pressing, book pressing and crease pressing.


Book Pressing is very easy, but it can cost you time. It's best for projects that need a really crisp edge or for really thick seams. Simply lay a stack of books on top of your seam(s) for a few hours or overnight. Gravity and the weight of the books flatten out your oilcloth so you can stitch with ease.


This next one is just a good old finger press. All you do is rub your finger, thumb or the palm across the seam that you need to be flatten and tamed. Tip: I always press both my seams off to one side when working with oilcloth, it's just gives you a nicer finish. Trust me trying to keep open seams flat on oilcloth is a losing battle.


The last method I have for you is the crease press. I do this when I work with the 1" oilcloth trim that I used on the floor mat in At Home with Modern June. All you have to do is fold your trim in half and rub the oilcloth trim along the edge of your table. This just creates enough of a crease down the center so you can sew fast and free!

I hope this helps you in your addiction to oilcloth!

XOXOX,
Kelly

Tuesday, April 8, 2014

One very exciting Monday morning!


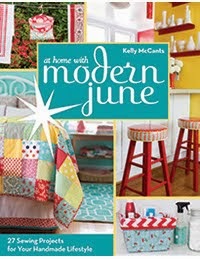
Well yesterday was a doozy! It was day one for my blog tour and I was on TV! It was a great way to kick off the launch of my new book, At Home with Modern June! 

The day started with a demo on Virginia This Morning on WTRV CBS 6. Jessica Noll and I chatted about the book and how to make a no-sew placemat out of chalk cloth.

Then, it was blog tour time! Stash Books Blog kicked off our blog tour with a post and a give away! I am so amazingly proud of this book. It's filled with sewing projects for every room in the house using every type of fabric out there.

Follow along with me on Instagram, Twitter, Pinterest and Facebook for more blog tour updates.

Monday, April 7, 2014

Let's sew together!


I'll be teaching a class this Saturday at The Happiness Factory, in Chester, VA. Join me as we make the Repurposed Buntings from my new book At Home with Modern June.

You're welcome to bring your own fabric(s), or pick from a fun assortment of vintage sheets and trims that I'll have avaible at the class. The class is on Saturday, 10:30 to 12:30. There will be books for sale and yummy sweets for nibbling.

Sign up today at The Happiness Factory!!