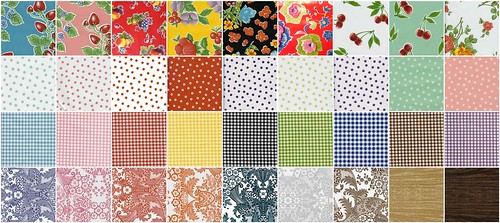
It is time to get this summer rolling! For our first summer tutorial, we are gonna trick out a
vintage picnic basket and go off for a well organized picnic! This is a basket I made for a dear friends bridal shower gift. I have to say it was a big hit!
I started off this project by shopping for a vintage picnic basket on
Etsy, I found my gem of a basket at
Stiletto Girl. Since then I have found a few at local antique shops that are just as sweet.
Once I had the basket ordered, I grabbed my stash of vintage cloths napkin sets, and headed off for Target. There I found plates that were on my friends bridal registry and they matched one of the groovy napkin sets. Sweet! I grabbed two of everything for a romantic picnic for two. Oh to be a newlywed once more!
Once the basket got here, I knew it needed some extra love! I grabbed some oilcloth that worked with the plates and napkins"
orange lace and
walnut faux bois. This was really a fun project, I am itching to make on for myself!
materials:
- 1-2 yards of oilcloth depending on if you want to do a contrasting pocket.
- picnic basket or cooler!
step 1. To create a bottom lining you will want to trace the bottom of the basket on to the wrong side of the your oilcloth.
step 2. Then cut inside the pattern 1/2 inch to make it fit the inside of the basket. You may need to trim a bit off here and there since the inside shape isn't exactly the same as the outside. Be patience and just take small amounts off at a time, do this until you get it to fit snugly inside the basket.
step 3. Measure the inside circumference of your basket and add 3 inches. The circumference of this basket was around 55 inches.
 step 4.
 Cut two pocket layers, one at cir. plus 3" by 10" and the second at cir. plus 3" by 8". You may need to piece this together to make it long enough.
step 5. Hem the top of both pocket layers at 1 1/2".
step 6. Lay the 8" layer on top of the 10" layer and sew them together at the bottom. Oilcloth doesn't fray so feel free to so a simple edge stitch.
step 7. Now for the fun part, pockets--lots and lots of pockets! I am giving you my basic layout but you can certainly tailor your picnic pocket to suit your needs.
step 8. Now pack up that bad boy and get to picnicin' !!
NOTE: Since oilcloth is waterproof and easy to clean you could make an extra picnic pocket for the cooler, think condiment storage!!! I love it! I am so doing that for our Wednesday pool cookout night!